Ready to start teaching English online?
Teach with VIPKidAs traditional classroom teachers transition into online teaching and having to work from home, they may still be figuring out how to get their teaching space up to snuff. Veteran online teachers, who may have already mastered how to make money online as a side hustle or part-time job, could also be yearning for new ways to breathe life into their teaching spaces, but don’t know where to begin.
We here at VIPKid, can help you get started quickly and, with a little creativity and a shoe-string budget (or a big budget if you have it), have your home classroom in tip-top shape with less effort than going Marie Kondo in your bedroom.
First, ask yourself which aspects of your classroom need an upgrade. Should I move my furniture around? Do I need to be more organized? Is there enough light? Do I need all of it?
Then, read on for some VIPKid pro tips to help anyone upgrade their space into a cozy online classroom…on a budget of course.
Tip #1 Rearranging Your Furniture
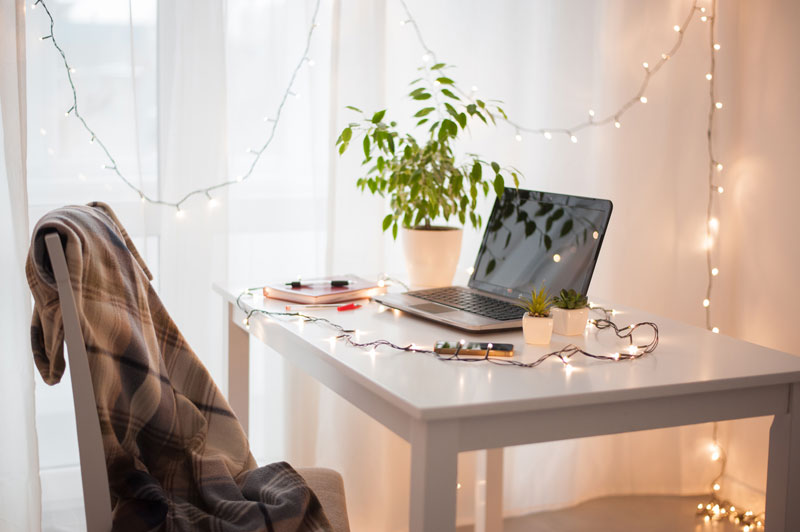
Sometimes the best makeover doesn’t need to cost anything except some time and a bit of sweat. Moving a desk, a sofa, or a monitor can have an enormous impact on how effectively a space is being used and is a cost-effective way to keep a classroom fresh.
Think about the amount of space you will need to do your work and the amount of space you have available. The way you arrange your furniture is going to be different if you are setting up a classroom in a home office or a home closet (we have seen both and, while different, they can both work). Many teachers want to have a separate workspace and storage space, so consider where the workspace will be located and how much of it will be visible on camera.
Bonus Tip:
Do you want to stand or sit while you teach? Maybe you want to have the option to do both. If you don’t have a standing desk, consider using items you already have in your home to elevate your laptop so that your camera remains at eye level while you are standing (keeping a camera at eye level provides the most personal connection with your students and produces the most flattering image.) Amazon boxes covered in patterned contact paper or breakfast in bed tray tables added to a standard desk are resourceful ways to use things you already have.
Tip #2 Assess Your Organization & Storage
Whether you teach beginning or advanced students, good online teachers keep their lessons engaging by using various props and tools. Space can become limited by all of the flashcards, puppets, and books that we want in our classrooms. But where does it all go? Cardboard boxes, baskets, or really any container you already have around the house can work. If the container isn’t exactly the newest or prettiest, that’s okay. Place it out of the camera so only you can see where it is.
Finger puppets or alphabet pieces hot-glued to popsicle sticks work great for those teaching younger students who have never had someone teach them online. Make sure to keep those props upright and contained in a container with dried beans. Puppets used to engage young learners can be kept nearby on a repurposed standing paper towel holder. Other teachers reuse old cookie sheets or even attach galvanized steel oil trays to their walls to hold magnetic letters. Get creative here and make it fun.
Those teaching older students may keep engaging props (such as lesson-related realia) just off-camera in a shoebox. Hanging plastic shoe racks can also easily hold flashcards, puppets, and toy props within reach.
When considering how to organize your props and tools, remember to think about your technology too. A 3M Command hook attached to your desk will hold your headset when not in use and will help you maximize your workspace.
Tip #3 Improve Lighting
Consider your classroom lighting as you begin to rearrange your furniture. Assess window placement and think about how the natural lighting will (or will not) illuminate your space. Some teachers prefer to use natural light while others choose to cover the window in favor of a more static and consistent lighting arrangement.
Remember: Students are more engaged when they can see their teachers and instructional material on camera. Bright, happy spaces lead to bright, happy learners. You are building an important connection with someone on the other side of the world and you want them to be able to see that beautiful smile of yours.Try to remove as many shadows as possible on your face and background by adequately illuminating your space.
Proper lighting can be broken down into 3 parts: key lighting, fill lighting, and backlighting. Don’t worry — we aren’t trying to turn you into a Hollywood grip (fun fact: a grip is what you call the guys who do all that fancy movie lighting). This is very simple when you know the basics!
- Key lighting is your main source of light, most likely positioned behind your webcam. Any old lamp should do, and it’s even better if the head is maneuverable. Many teachers also like using a full-size selfie ring or clip-on selfie rings.
- Fill lighting “fills” the remaining shadows on the face. This is done with a second light positioned to the side of your desk at about a 45-degree angle. Consider removing the lampshade or adjusting it to direct the light.
- Add a bit of light behind you to brighten the classroom and to add depth to your image. This is backlighting. Remember that the actual lamps should not be seen on camera. This is nice to have but may not be necessary depending on the size of your space.
Tip #4: Reboot Your Background
Having a bright and attractive educational background can help you attract and engage young students. Some teachers get fabric pieces in bright solid colors to use as the base of their background. After a quick iron (yes, just that old iron sitting in your closet will do), the fabric can easily be stretched tightly and pinned to the wall with tacks. If you are feeling a little “extra” and want to up your game, use 3M command strips to attach a galvanized metal drip tray to the wall before stretching your fabric. This will create a smooth magnetic surface for your background where magnetic props and rewards can stick at arms reach!
A whiteboard can be the “jack of all trades” for your classroom. If you don’t have one, repurpose an old picture frame by placing white paper under the glass. If your frame is large enough, attach it to the wall and use dry erasers as you would with a regular whiteboard at school (just remember to check for glare from your lights). If there’s a glare on your background, angle the lights to the side of your desk or at a downward angle to reduce the reflection.
If you are looking for more and really want to make your classroom pop, we have some bonus suggestions for you. Add a colorful homemade triangular garland from yarn and leftover craft foam, a homemade banner made from twine and strips of colorful torn fabric, colorful paper fans, or a few pom pom flowers from the party section of the dollar store! Online teachers may consider adding their teacher show name and an approved map to elevate the classroom further and really connect with students.
Tip #5 Prioritize Self-Care
Having a space that you look forward to being in can keep you going after a long day (or night) of teaching. Take a moment to think of one thing that you can do that would bring you a moment of joy. Maybe a colorful new coffee mug for your morning cup of joe, a cozy blanket to put over your lap, or an essential oil diffuser to freshen the air while you teach? You can also snip a few flowers from your garden or create a cute little pillow area for your pup to sleep in the corner. Adding one small delight to your classroom will help you create the perfect space and add positive energy to your classes, so pick something that brings you to your happy place and roll with it.
There is no need to break the bank when creating or updating your online classroom. With a plan, a budget, and creativity, anyone can create a cozy online classroom on a budget.
Have you seen the first episode of our Classroom Makeover web-series? Watch how VIPKid surprised one lucky teacher and transformed her at-home teaching space with the tips above!
If you enjoyed this article, check out our blogs on Attitude and Rapport and TPR and Physical Modeling.
This Teaching Essentials Blog Series looks at some tools-of-the-trade for online ESL instruction. In it, we explore a few key concepts and dive into what makes them indispensable to our teachers.